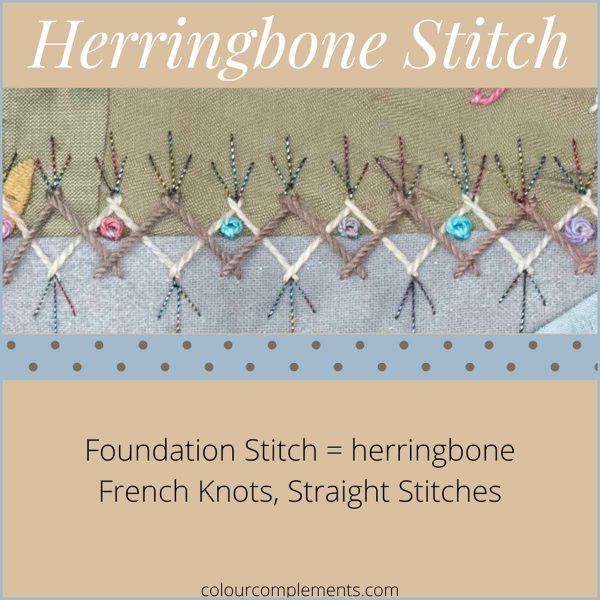
I wanted to demonstrate how very versatile this stitch can be in creating a beautiful and unique herringbone stitch pattern. Two of the stitching techniques were shared over the last couple of months. Our third example illustrates how we can create a fun stitch pattern using the herringbone stitch technique.
I started with a very basic herringbone and then offered a second sample with embellishing. Both of these we’ve covered in previous posts in May and June. The difference in this sample is that the seam treatment above uses two rows versus one of the herringbone stitches.
How we created this herringbone stitch pattern
The base fabric at the top is a green polyester crinkled fabric while the bottom is grey cotton sprinkled with metallic. The first herringbone row is stitched with a cream coloured Perle cotton while the second is a taupe coloured Perle cotton (hint – if you are stitching two rows in your seam treatments, always ensure the thread colours contrast with one another).
Once the foundation rows were completed, I added straight stitches to the top and bottom with a very fine metallic thread. This is a machine thread I picked up when I was doing free motion quilting in the past. It is made by Madeira and it’s called FS Metallic. I use it a lot in my crazy quilting so you might like to pick some up. To complete the treatment I added French knots along the seam line using a leftover scrap of variegated Perle cotton.
I hope I’ve managed to demonstrate with our three versions of herringbone stitch how embellishing can really enhance your seam treatments. They are not as complex as they may appear so experiment and see what you come up with.
Mary at Needle ‘N Thread offers a great video for herringbone stitch.
If you are new to my seam treatment series and want to learn more, check out categories – crazy quilting – seam treatments.
Next month I’ll be featuring another stitch in our foundation seam treatment series.


